

Water showing up where it shouldn’t is a clear sign something is wrong. A damp cabinet under the sink, a steady drip at a connection, or a growing stain on the ceiling all point to a leaking pipe joint. Left unchecked, even a minor leak can lead to water damage, mold growth, and costly repairs.
Most pipe joint leaks come down to simple issues like loose fittings, worn seals, or minor connection failures. These problems often start small but worsen quickly if ignored. Acting early keeps the repair straightforward and prevents more serious damage.
This guide explains how to stop water leaking from pipe joints, what causes these leaks, and when a basic fix is no longer enough.
Key Takeaways
- Loose connections, worn seals, corrosion, and poor installation are the main causes of water leaks at pipe joints.
- Identify leaks under sinks, at supply lines, behind fixtures, and around threaded pipe connection fittings.
- Tighten fittings, replace washers, and apply tape or epoxy sealant to stop leaking pipe connections.
- Inspect pipe joints regularly for corrosion and leaks, tighten connections, and replace worn washers promptly.
- Call a plumber for hidden leaks, corrosion damage, repeated failures, or situations with water damage risk.
How to Stop Water Leaking from Pipe Joints
The immediate answer is this: turn off your water supply, identify the source of the leak, and tighten the connection. For most homeowners, this single step stops the leak entirely.
Start by locating the main water shutoff valve. This is typically in the basement, crawlspace, or outside near the foundation. Turn it clockwise until the water stops flowing through the pipes. If you can’t find the main shutoff, close the valve closest to the leaking joint.
Next, get under the sink or behind the fixture and locate the exact source of the leak. Water sometimes travels along the outside of a pipe, making it hard to pinpoint the leak’s origin. Use a dry cloth to wipe the pipes and follow the water trail backward to its source.
Once you’ve identified the leaking joint, use a wrench to tighten the fitting. Place one wrench on the fitting and another on the nut, then turn slowly. A quarter-turn is often enough to stop a minor leak. Do not over-tighten, as this can crack the fitting or the pipe itself.
If tightening doesn’t stop the leak, the internal seal has likely failed. You’ll need either a temporary patch or a permanent fix. For a temporary seal, apply pipe sealant tape (also called plumber’s tape) around the threaded part of the connection, then retighten. For a permanent fix, replace the washer or O-ring inside the fitting, or have a plumber replace the entire joint.
4 Reasons Pipe Joints Leak
Pipe joints fail for specific, preventable reasons. Understanding what causes the failure helps you fix it correctly.
- Loose Connections
The simplest cause is loose-fitting. Vibration from water pressure, settling of the house, or initial installation problems can loosen connections over time. A connection that’s finger-tight but not wrench-tight will eventually leak as water pressure pushes against the seal.
- Worn Washers or O-Rings
Inside every joint is a small seal, typically a rubber washer or O-ring. This seal compresses when the joint is tightened, preventing water from escaping. After years of use and pressure cycles, the rubber hardens and loses its ability to compress. Once the seal fails, water leaks even with the joint fully tightened.
- Corrosion and Oxidation
Copper pipes develop a patina that actually protects them, but threaded brass fittings corrode differently. If the fitting is old or exposed to aggressive water chemistry, the metal can pit and deteriorate. Corrosion creates tiny holes and rough surfaces that a simple seal can’t cover. The leak continues no matter how tight you make the connection.
- Poor Installation
Fittings installed without proper sealing tape, with damaged threads, or at the wrong angle create immediate or eventual leaks. If a fitting was never properly sealed in the first place, years of pressure eventually force water through the weak connection.
4 Common Leak Points in Pipe Connections
Leaks don’t happen randomly throughout your plumbing. They occur at specific locations where connections are stressed or exposed to conditions that accelerate failure.
- Under-Sink Drain Connections
Drain fittings under sinks are the most common leak location because they operate at low pressure, and the seals are simple. The slip nut connects the drain trap to the main drain line. This joint uses a rubber washer compressed between the nut and fitting. When the rubber degrades, water drips onto the cabinet floor. This is often the first place homeowners notice a problem.
- Supply Line Joints
Hot and cold supply lines connect to shutoff valves under sinks and behind toilets. These connections experience constant low-level pressure. The compression fitting holds a small ferrule (ring) against the pipe. If the ferrule cracks or the nut loosens, water escapes. Supply line leaks are particularly problematic because the water is hot or at full pressure.
- Threaded Pipe Fittings
Where pipes are joined with threaded connections, the seal depends on the tape or pipe dope used to seal the threads. If applied incorrectly or the threads are damaged, leaks follow. These joints are common in basements, crawl spaces, and behind walls where pipe direction changes.
- PVC Slip Joints
Plastic drain pipes use slip nuts to connect sections. The rubber washer inside creates the seal. These joints are straightforward to tighten and repair, but when the rubber washer fails, simply tightening won’t help. The washer must be replaced.
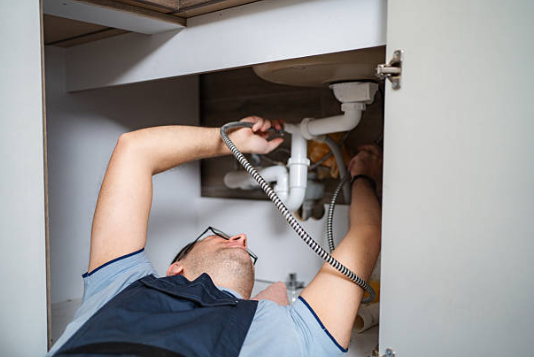
How to Fix a Leaking Pipe Joint
Most homeowners can handle basic pipe joint repairs. The process is straightforward once you have the right tools and understand what’s happening inside the fitting.
Step 1: Gather Your Tools
You’ll need two adjustable wrenches (or one pipe wrench and one adjustable wrench), plumber’s tape, a new washer or O-ring if you’re replacing the seal, and a bucket to catch water. Having a dry cloth nearby helps identify the exact leak point.
Step 2: Turn Off the Water
This is non-negotiable. Even a small leak means water under pressure. Turning off the supply prevents water from spraying when you loosen the joint.
Step 3: Loosen and Remove the Fitting
Use one wrench to stabilize the main fitting while the other loosens the nut. Once loose, unscrew by hand and remove the washer inside. Inspect it for cracks, hardening, or permanent deformation. If it looks degraded, a new washer will solve the problem.
Step 4: Clean the Threads
Wipe the threads inside the fitting with a cloth to remove mineral deposits or debris. Corrosion makes sealing difficult. If you see significant corrosion, the fitting may need replacement rather than repair.
Step 5: Install a New Washer or Apply Tape
If replacing the washer, insert a new rubber washer of the same size. If resealing a threaded connection, wrap the male threads with plumber’s tape. Use three to four wraps, stretching the tape as you wrap. This compresses the tape into the thread gaps, creating a water-tight seal.
Step 6: Reinstall and Tighten
Screw the fitting back together by hand first, then use the wrenches to tighten firmly but not excessively. A quarter-turn past snug is usually sufficient. Over-tightening crushes the seal and can crack brass fittings.
Step 7: Turn Water Back On and Inspect
Restore water pressure slowly and watch the connection for several minutes. If no water appears, the leak is fixed. If water still drips, the seal may not be compressed enough, or the fitting may be damaged beyond repair.
How to Seal a Leaking Pipe Joint
When basic tightening doesn’t work, you need a sealing product. Different situations call for different approaches.
Temporary Seals
Plumber’s tape is the first temporary solution. Wrap it tightly around the threaded portion of the connection, then retighten. This works for minor leaks caused by incomplete tape application during installation. Pipe dope (a paste sealer) works similarly, coating the threads before the fitting is installed.
For emergency situations, epoxy putty provides a temporary waterproof barrier. Clean the area, knead the putty until uniform in color, and press it into the leak point. It sets within 15 to 30 minutes but is not a permanent solution.
Permanent Seals
Replacing the seal inside the fitting is permanent if done correctly. Once you’ve installed a new washer or O-ring, the leak stops. This works as long as the fitting and pipe threads are not damaged.
For corroded fittings where a simple seal won’t work, pipe repair epoxy creates a permanent chemical bond. Clean the area thoroughly, mix the epoxy, and apply it to the leaking joint. It hardens into a waterproof seal that handles pressure.
However, this only works on the outside of the fitting. If the leak is internal and the fitting is threaded, the fitting itself must be replaced.
When Sealing Fails
If you’ve tried tightening and replacing the washer, and the leak persists, the fitting is likely damaged beyond repair. Cracks in brass, corrosion that eats through the metal, or damaged threads mean replacement is the only solution. Continuing to patch a failing fitting wastes time and risks water damage behind walls.
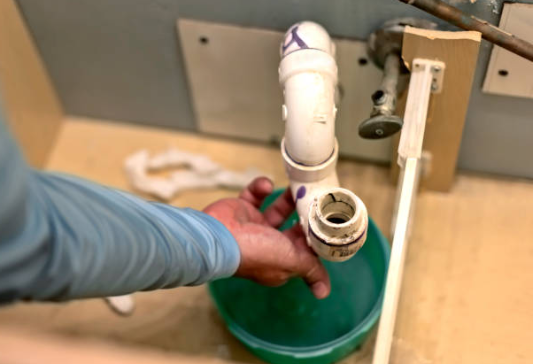
Sink Drain Pipe Leaking at Connection
The area under your sink is where most homeowners first notice a leak. A sink drain pipe leaking at the connection is usually simple to fix because these are low-pressure joints.
The P-trap under your sink has three connection points: where it connects to the drain tailpiece coming down from the sink, where the bend occurs, and where it connects to the main drain line. Water leaking from any of these three points usually comes down to a loose nut or a failed rubber washer.
Start by placing a bucket under the suspected leak point. Locate the slip nut (the large nut at the connection). Try tightening it with a pipe wrench or a large adjustable wrench. A quarter-turn often stops the drip.
If tightening doesn’t work, you need to replace the washer. Loosen the nut completely and remove it. Inside is a small rubber washer. Check if it’s cracked, hardened, or permanently compressed. If it looks worn, take it to a hardware store to have it measured and purchase an identical replacement. This costs less than a dollar and solves the problem permanently.
Install the new washer, hand-tighten the nut, then use a wrench for a final firm turn. Restore water pressure and check for leaks.
One important note: drain pipes operate at atmospheric pressure, not under the constant pressure of supply lines. A leaking drain connection is an inconvenience and a moisture problem, not a burst-pipe emergency. However, continuous dripping still wastes water and damages cabinet interiors through mold and rot. Fix drain leaks promptly to prevent structural damage.
When to Replace the Pipe or Fitting
Some leaks can’t be fixed by tightening or sealing. Recognizing when replacement is necessary prevents wasted time and ongoing water damage.
Signs a Fitting Needs Replacement
If you see visible cracks in the brass fitting, replacement is the only option. Cracks grow under pressure, and no sealant bridges a structural failure. Similarly, if corrosion has eaten through visible holes in the metal, the fitting has failed.
When a joint leaks repeatedly after you’ve replaced the washer and applied tape, the fitting threads are damaged. Corrosion, cross-threading during installation, or age can make threads too worn to create a seal. Once this happens, every attempt to tighten or seal fails.
Cost and Complexity
Replacing a fitting costs between fifty and two hundred dollars, depending on the location and type of fitting. Doing it yourself requires disconnecting the pipes, removing the old fitting with a wrench or hacksaw, and installing a new one. This is within reach for handy homeowners but requires care to avoid damaging the pipes.
If the leak is behind a wall or in a difficult location, professional replacement is worth the money. Hidden leaks cause the most damage because you don’t realize there’s a problem until mold appears or structural damage occurs.
When to Call a Professional
Several situations warrant professional diagnosis and repair. Knowing when to stop troubleshooting and call a plumber saves money and prevents damage.
Hidden Leaks
If water stains appear on ceilings or walls but you can’t find the source, the leak is behind the wall or above your visible area. A plumber uses moisture-detection tools to accurately locate hidden leaks. This prevents you from tearing into walls incorrectly.
Multiple Leaks
When several joints in your home start leaking simultaneously, the problem may not be individual fitting failures. Water chemistry issues, high water pressure, or settling of the house can cause multiple failures. A plumber diagnoses the root cause and addresses it system-wide, not joint by joint.
Persistent Leaks
If you’ve tightened the connection, replaced the washer, and the leak continues, the damage is beyond simple repair. A plumber assesses whether the fitting needs replacement or if a larger plumbing issue exists.
Water Damage Risk
If the leak is near electrical wiring, in an attic, or in a location where water can damage the structure, don’t experiment. Professional repair prevents costly damage to your home’s foundation, framing, or wiring.
Green Energy AC Heating & Plumbing Repair handles pipe joint leaks from diagnosis through permanent repair. Our technicians arrive with the tools and knowledge to stop leaks quickly, whether that means tightening, sealing, or replacing the fitting. We prevent hidden damage by identifying leaks before they compromise your home’s structure. Contact us for same-day pipe joint repair service.
Protecting Your Home from Pipe Joint Leaks
A leaking pipe joint starts small but grows quickly without attention. A single drip wastes thousands of gallons annually and signals that failure is progressing. More importantly, water damage begins immediately. Cabinet rot, mold growth, and structural deterioration happen quietly while you delay.
If you notice water under sinks, drips from connections, or wet spots on ceilings or walls, address it immediately. Start with tightening and washer replacement. These simple fixes cost nothing and often solve the problem. If basic repair doesn’t work, don’t keep trying. The leak will continue, and your home will suffer the consequences.
Prevent future leaks by inspecting pipe connections during your annual home maintenance. Look under sinks, behind toilets, and in basements for signs of corrosion, drips, or moisture. Catch problems early, fix them promptly, and you’ll avoid emergency repairs and water damage.
The cost of fixing a leaking pipe joint early is minimal. The cost of repairing water damage from an ignored leak runs into thousands. Act immediately when you spot a leak, and your home stays dry and protected.